Tips and cases of use for a successful WordPress website with calculated forms.
Generating runtime PDF files with the information collected by the form, using the PrintFriendly API, and send the files to users via email.
As I've explained in a previous post, up to the current version of the Calculated Fields Form plugin, to generate PDF files with the information collected by the form it is necessary the use of external services (The Platinum version of the plugin includes an experimental add-on to generate PDF files locally: CFF - PDF Generator add-on). Previously, I've described how to accomplish this task using WebMerge, in the current post I'll describe how to generate the PDF files using the PrintFriendly API.
To integrate the PrintFriendly API with the forms, would be required the the "CFF - PrintFriendly add-on" distributed with the Platinum version of the "Calculated Fields Form" plugin.
The "PrintFriendly add-on" works as follows: once the form is submitted, the add-on takes the HTML structure, entered into the form's settings (specifically in the PrintFriendly section), replacing the special tags with the information collected by the form, and sends it to the PrintFriendly service. The process returns a PDF file, the plugin sends to the users as attachment of notification emails.
I'll describe the process with a practical example:
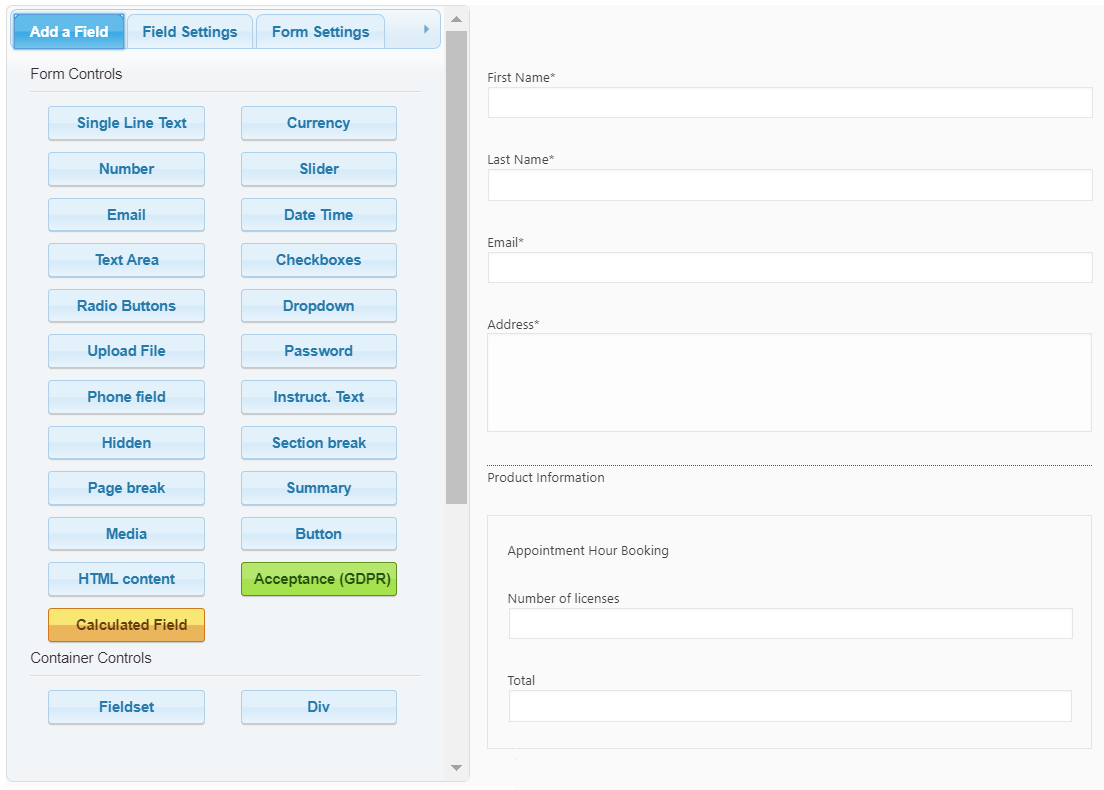
Assuming you have created a form with the structure:
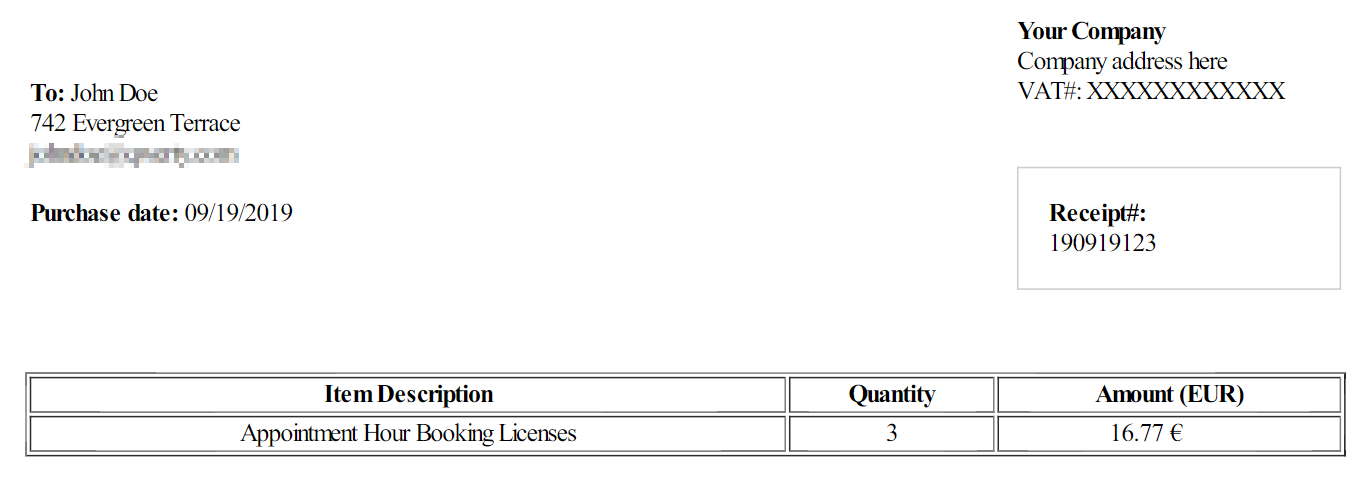
and you want generate invoices as PDF files, with the format:
The first step in the process is to obtain an API Key. To use the PrintFriendly services it is required an API Key, which is generated directly from the PrintFriendly website
As I said above, the integration with the PrintFriendly service is possible via the "CFF - PrintFriendly add-on" distributed with the Platinum version of the plugin.
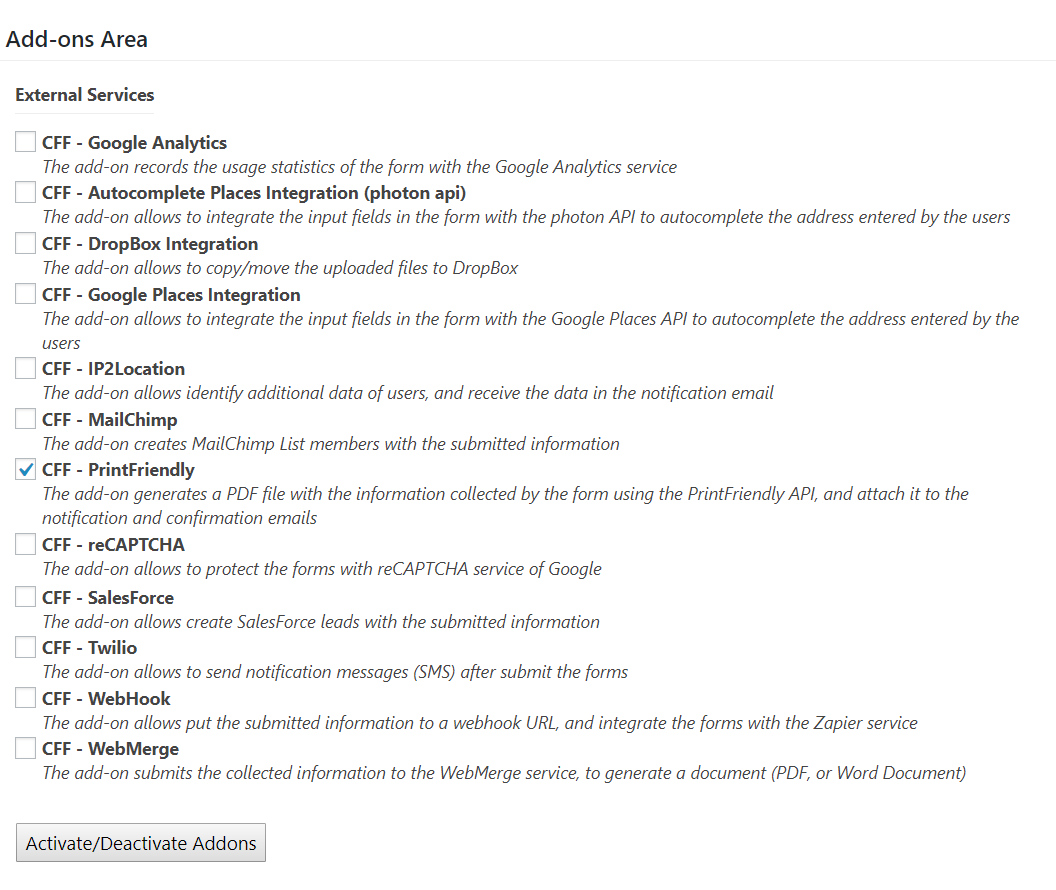
To enable the add-on, go to the settings page of the plugin, clicking on the WordPress menu option: "Calculated Fields Form". This page includes the list of available add-ons. Check the box corresponding to the "CFF - PrintFriendly" add-on, and press the button "Activate/Deactivate Addons":
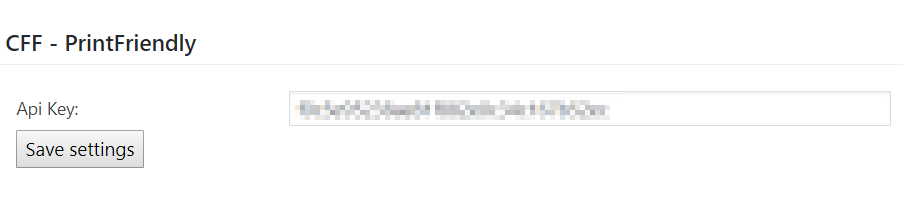
Activated the add-on, the plugin displays a new section to enter the API Key generated in the PrintFriendly service (First Step):
Once the add-on is enabled, a new section would be available in the form settings (to access the form settings, press the "Settings" button corresponding to the form on the settings page of the plugin), entitled "CFF - PrintFriendly":
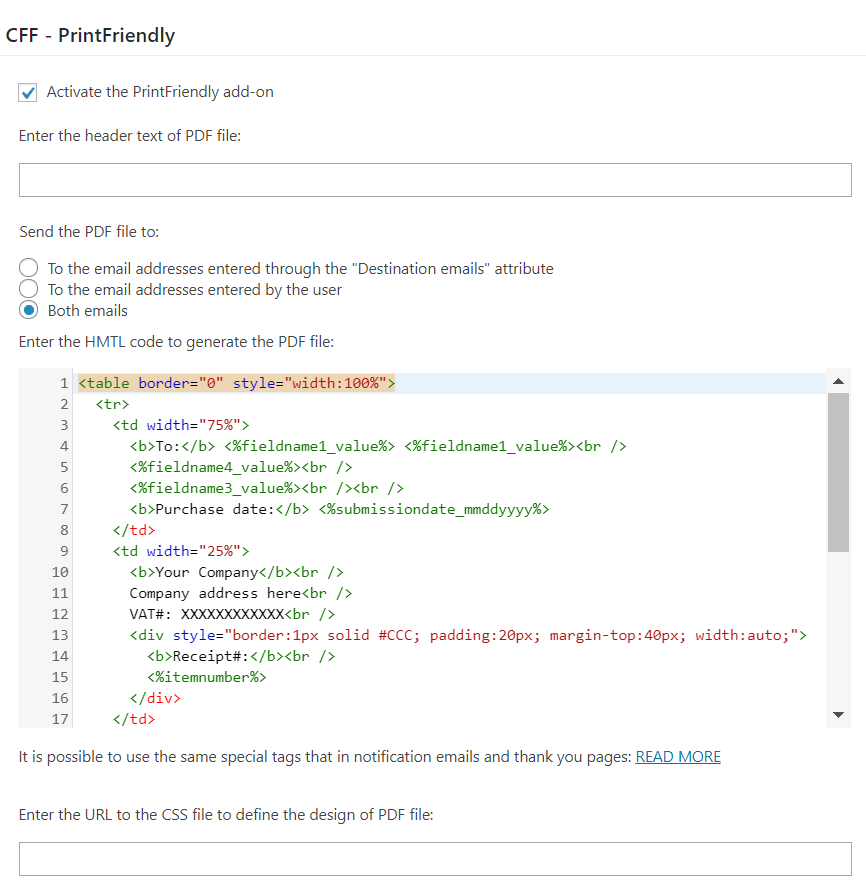
The PrintFriendly section includes four attributes:
Activate the PrintFriendly add-on: This checkbox allows integrate the PrintFriendly with the form, or disabling the integration temporarily or completely.
Enter the header text text of PDF file: This text would be displayed at the top of document, in the example described in this post, a possible text could be: Purchase Receipt or Invoice
Enter the HTML code to generate the PDF file: This special text area is basically a HTML editor. Actually, the content of PDF files is defined as a HTML document, combining HTML tags with the special fields' tags. Similar to the notification emails or thank you pages.
<table border="0" style="width:100%">
  <tr>
    <td width="75%">
      <b>To:</b> <%fieldname2_value%> <%fieldname1_value%><br />
      <%fieldname4_value%><br />
      <%fieldname3_value%><br /><br />
      <b>Purchase date:</b>  <%submissiondate_mmddyyyy%>
    </td>
    <td width="25%">
      <b>Your Company<b><br />
      Company address here<br />
      VAT#: XXXXXXXXXXXX<br />
      <div style="border:1px solid #CCC; padding:20px; margin-top:40px; width:auto;">
        <b>Receipt#:</b><br />
        <%itemnumber%>
      </div>
    </td>
  </tr>
  <tr>
    <td>
        <table border="1">
          <tr>
            <th>Item Description</th>
            <th>Quantity</th>
            <th>Amount (EUR)</th>
          </tr>
          <tr>
            <td>Appointment Hour Booking Licenses</td>
            <td><%fieldname8_value%></td>
            <td><%fieldname9_value%></td>
          </tr>
        </table>
    </td>
  </tr>
</table>
Note: As the generated file is sent to the users by email, don't forget to select the "Yes" option for the attribute: "Include attachments?" in the Email Settings section.

For hiding the footer, title and URL to the source document, included by PrintFriendly in the generated PDF files, should be included the following block of CSS into the .css file, whose URL was entered through the Enter the URL to the CSS file to define the design of PDF file attribute, in the form's settings:
#pf-src{display:none !important;}
#pf-title{display:none !important;}
#pf-footer{display:none !important;}