Tips and cases of use for a successful WordPress website with calculated forms.
Categories: Add-ons, Automation, API & Services Integration
Generating new SalesForce leads, with the users information collected by the website's forms.
For the companies or websites' owners that use the SalesForce customer-relationship management (CRM) service, the Developer and Platinum versions of our plugin are distributed with the "CFF - SalesForce add-on". The "CFF - SalesForce add-on" allows to generate new SalesForce leads with the users' data collected by the form.
To integrate the forms on the website with SalesForce, please, follow the process described below:
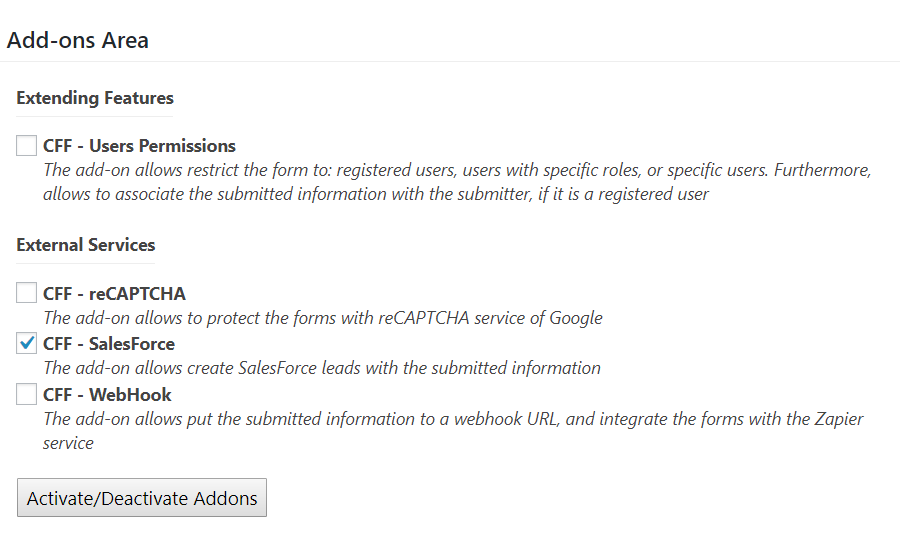
Go to the settings page of the plugin, through the menu option: "Calculated Fields Form" in the main WordPress menu.
From the list of add-ons, tick the box corresponding to the "CFF - Sales Force" add-on, and press the "Activate/Deactivate addons" button.
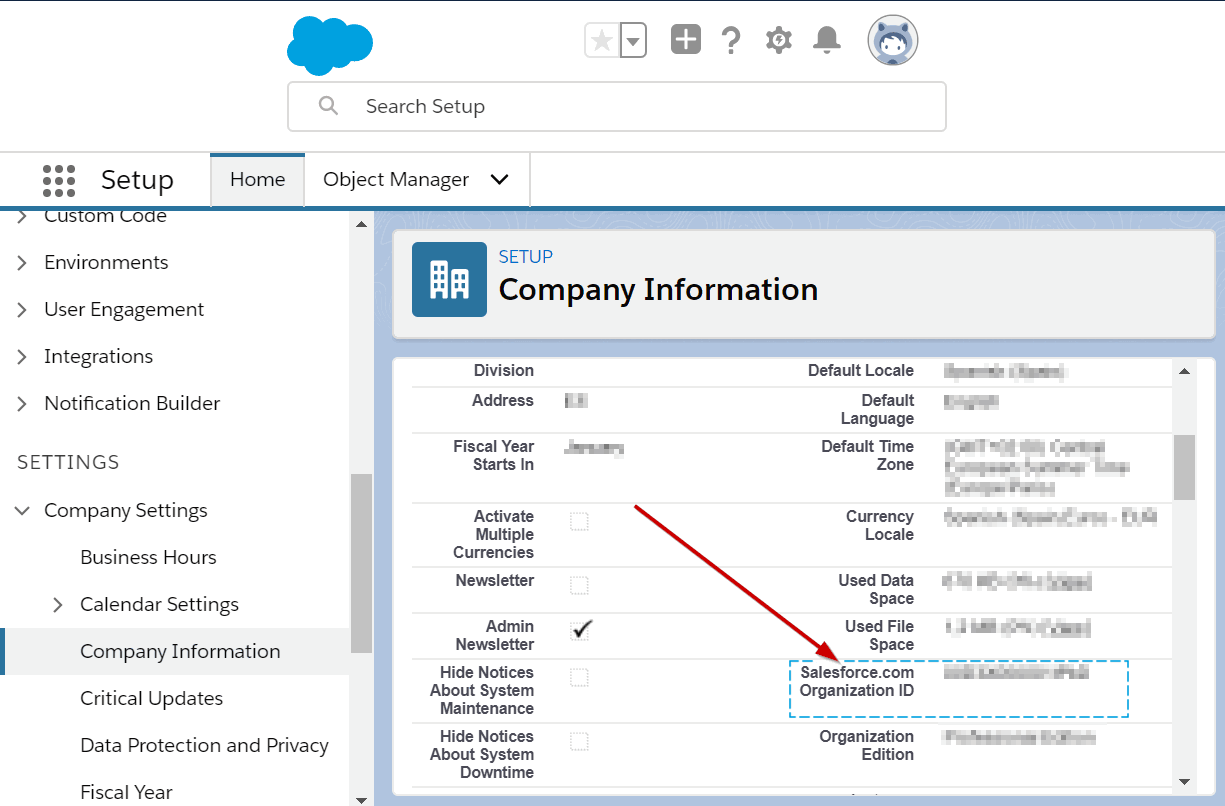
To integrate the form with SalesForce, would be required the Organization ID from SalesForce, and generate a Web-to-Lead, in SalesForce too, to get the attributes' names.
Logging into the SalesForce account and go to the menu option: "Click on Gear Icon > Setup > Company Settings > Company information"
Copy the Organization ID, because it would be required for integrating the form with SalesForce.
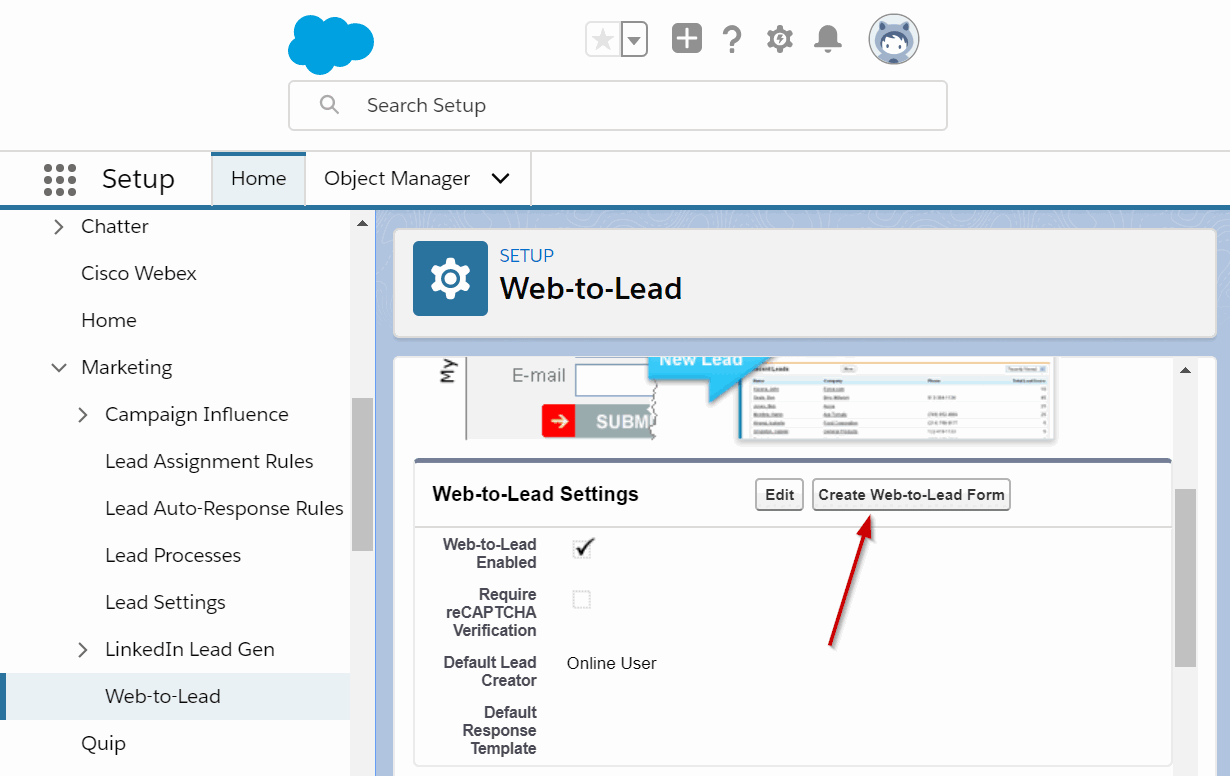
To generate the Web-to-Lead form:
From Setup, enter Web-to-Lead in the Quick Find box, then select Web-to-Lead.
To enable or change Web-to-Lead settings, click Edit.
Select the fields to capture by the leads, and disable the "Require reCAPTCHA Verification" option.
Finally, press the "Generate" button.
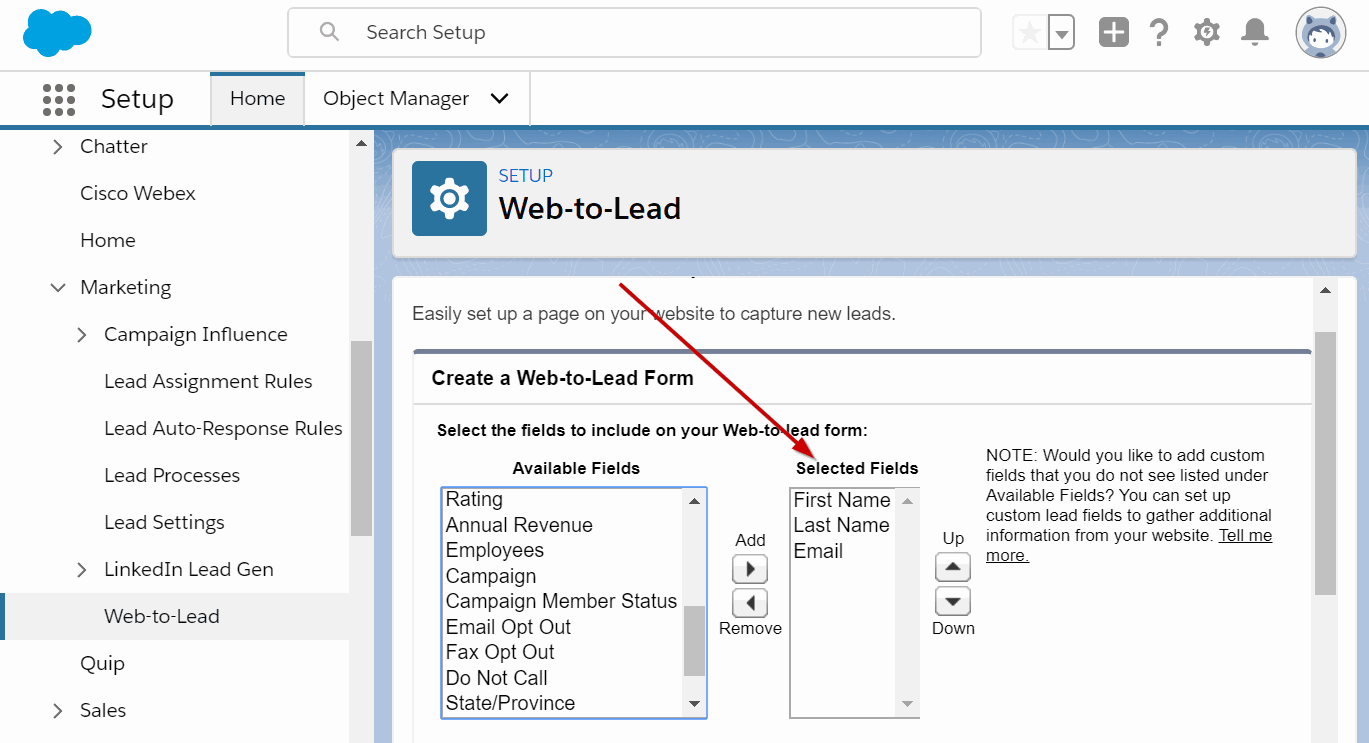
In this case, the generated web-to-lead form includes three fields: first_name, last_name and email.
Now, it is time to integrate the SalesForce with the form.
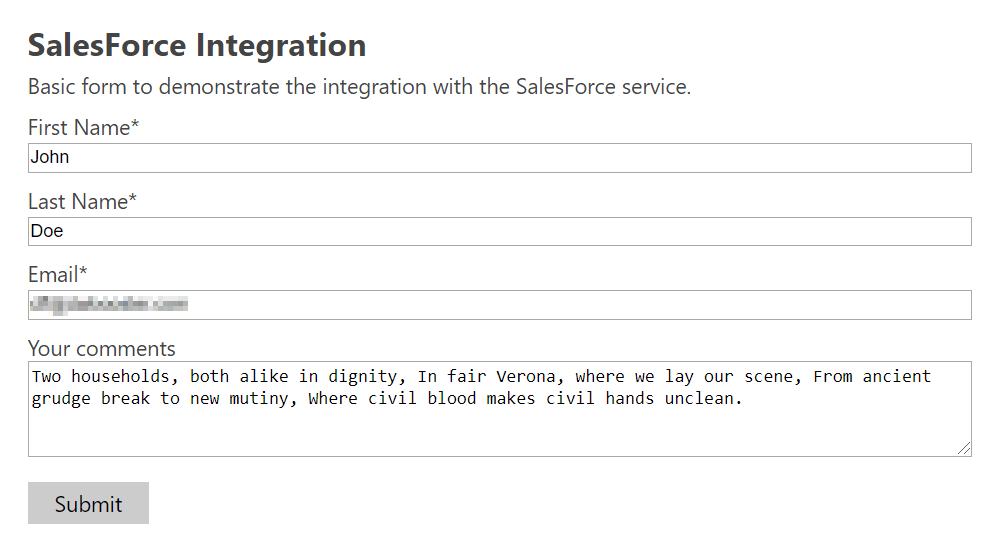
I've created a contact form with the structure:

The previous form includes four fields: two Single Line Text fields for entering the first name and last name of users (fieldname1 and fieldname2 respectively), one email field for entering the users emails (fieldname3), and a text area field for entering the comments (fieldname4). As I've selected only the first_name, last_name and email attributes in SalesForce, I'll use only the fieldname1, fieldname2 and fieldname3 fields in the form for the SalesForce integration.
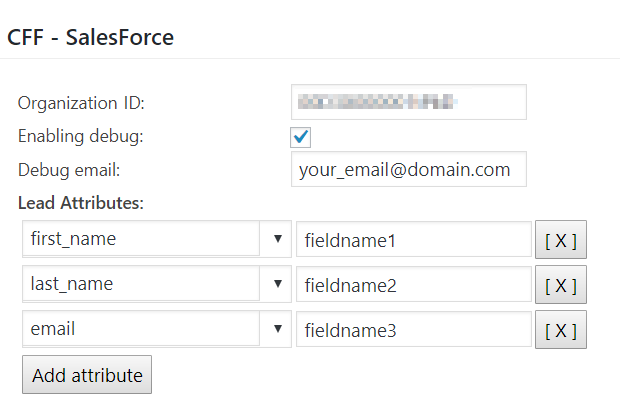
In the first attribute enter the organization ID obtained previously from SalesForce.
For debugging the integration of form with SalesForce (this allow you to know if there is any issue with the leads generation process), tick the "Enabling debug" box, and enter the email address where receive the emails with the integration issues.
Finally, create the relationship between the attributes in SalesForce and the fields in the form.
Populate the public form:
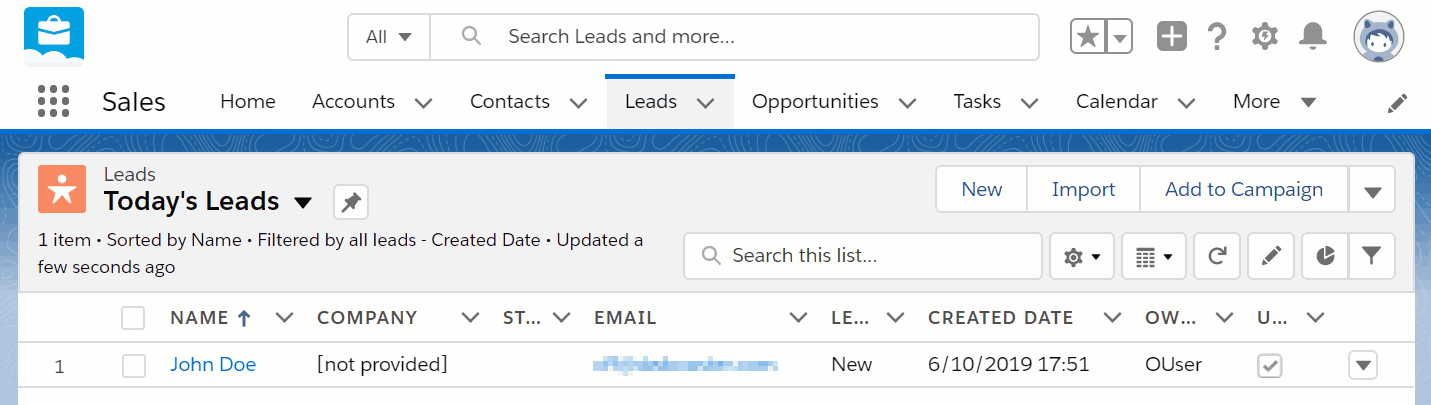
...and after submitted, you will see the new lead in SalesForce: