Tips and cases of use for a successful WordPress website with calculated forms.
Categories: Add-ons, API & Services Integration, Data Sources
The post responds to the following question: * How to store the information collected by the form in a CSV file? * How to use the information in the CSV file from Google Sheet?
Since the initial versions of the Calculated Fields Form plugin, exists the possibility to export the information collected by the form as a CSV file from the "Messages" sections of forms (Exporting CSV files manually), however, this process is manual: The website administrator should to access to the settings page of the plugin, press the "Messages" button corresponding to the form, and then, from the "Messages" section associated to the form, press the "Export to CSV" button, and select a location into the local computer where to save the file.
The process described above is completely manual and requires the intervention of a user with administrator role.
But what to do if you need to export the collected information to a CSV file dynamically, in every form's submission, to use this file with other applications or services like Google Sheet?
For this situation, the "CFF - CSV Generator" add-on comes to the rescues.
The "CFF - CSV Generator" is an add-on, distributed with the Platinum version of the plugin, that allows exporting the information collected by the form to CSV files dynamically when the form is submitted, without the intervention of an administrator.
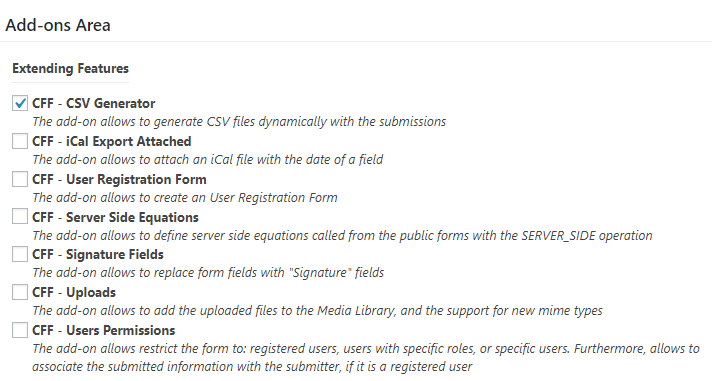
To activate the add-on, go to the settings page of the plugin, through the menu option: "Calculated Fields Form", tick the checkbox: "CFF - CSV Generator", and then, press the "Activate/Deactivate Addons" button.
Once the add-on is activated, it includes a new section in the forms' settings that allows integrating the add-on with the form:
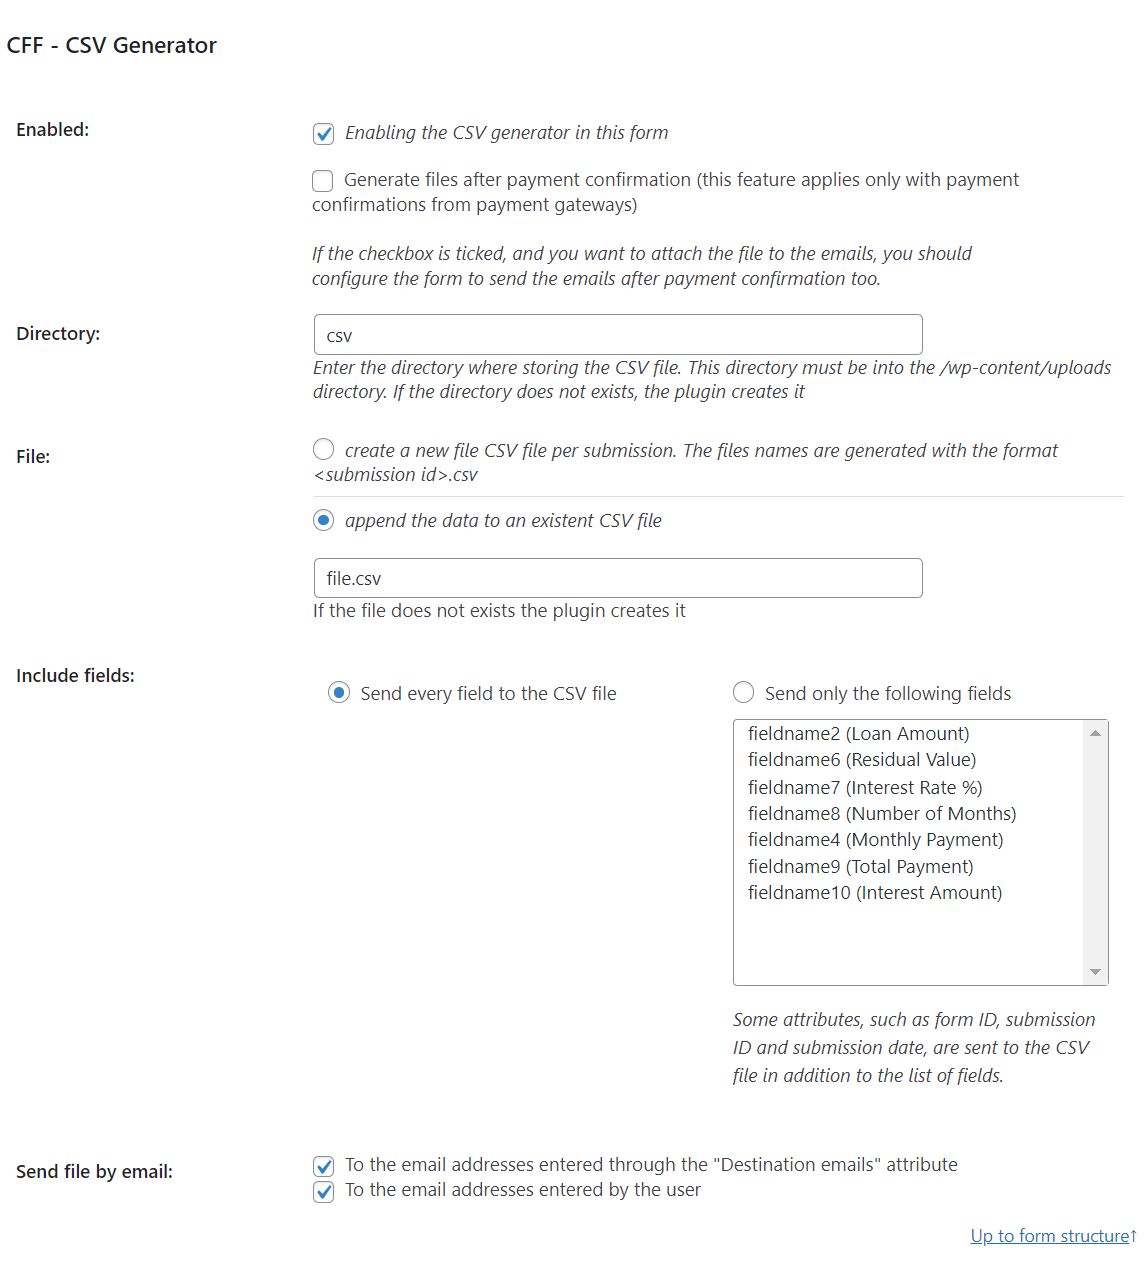
To integrate the form and the add-on:
Tick the "Enabled" checkbox.
Enter the name of the directory where the CSV files will be generated. This directory would be generated into the path: "/wp-content/uploads". For example, if the directory name is for example "csv", the csv files would be generated into the directory: "/wp-content/uploads/csv/"
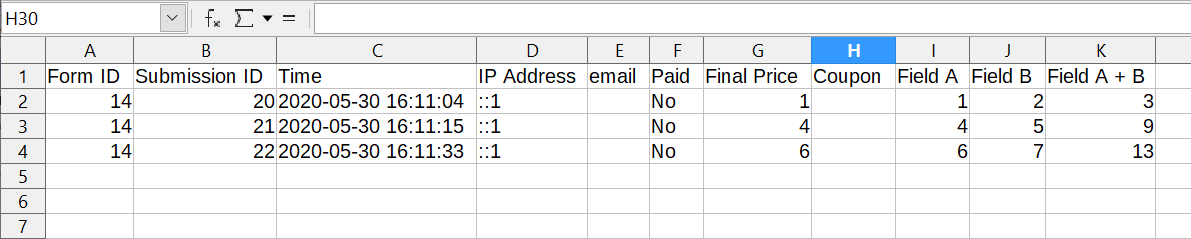
The add on allows to generate a new file per submission, or store all collected information into the same csv file, appending new records to the file. If the file's name is, for example, file.csv, following with the previous example, it will be generated into "/wp-content/uploads/csv/file.csv"
From the settings, it is possible to select the fields to export.
The generated CSV files could be sent as attachments into the notification emails and/or the email copy to the users.
[CP_CALCULATED_FIELDS_RESULT]

<a href="<%csv_generator_url%>">Download CSV File</a>

[/CP_CALCULATED_FIELDS_RESULT]
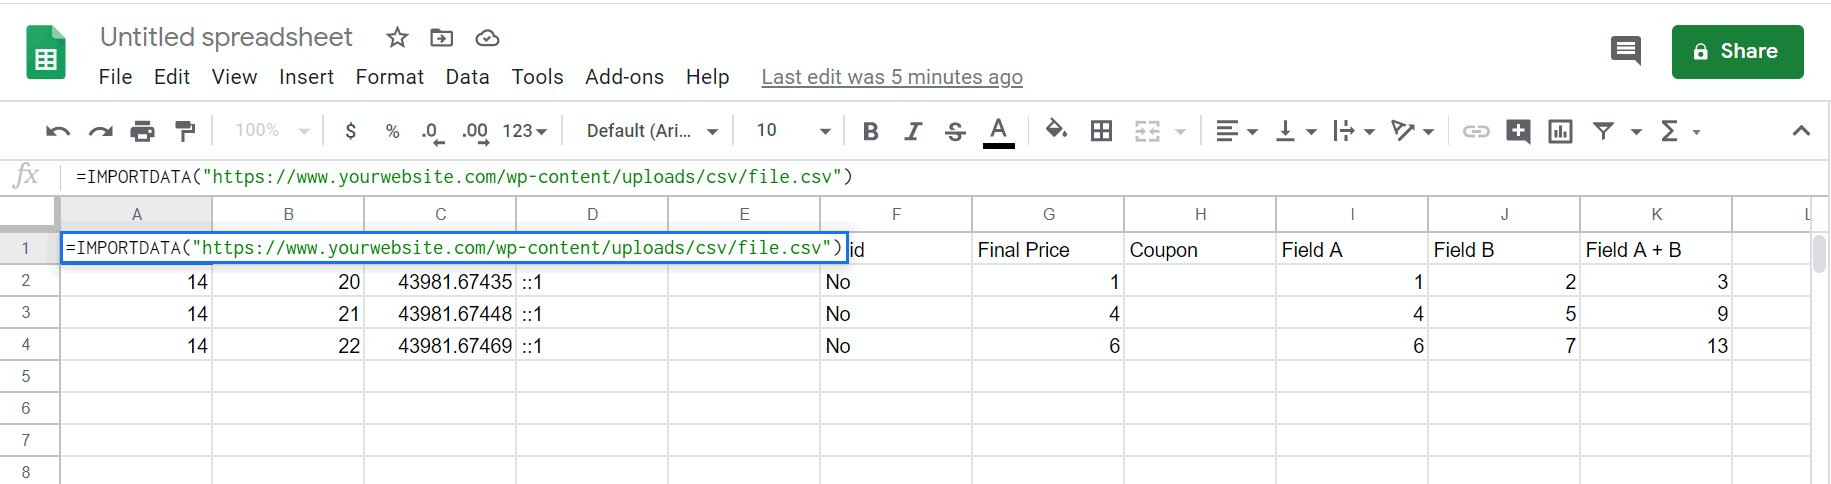
Open the Google Sheet document and call the IMPORTDATA operation, passing as parameter the URL to the CSV file in your website: