Tips and cases of use for a successful WordPress website with calculated forms.
Categories: Add-ons, PDF Generation
The PDF Generator add-on allows to generate PDF files directly on the web server, it does not need third party services. The contents of PDF files are defined using HTML tags.
The Calculated Fields Form plugin includes multiple add-ons to generate PDF files with the information collected by the forms, like the PrintFriendly add-on or the WebMerge add-on. But both add-ons require third-party services to create the PDF files, the PrintFriendly API, and the FormStack Document (formerly WebMerge) that are not free.
The PDF Generator add-on (distributed with the Platinum version of the Calculated Fields Form plugin), generates PDF files with the information collected by the form and sends them by email, similar to the other add-ons, but with the advantage that the process happens in the local web server. That means no extra payments are needed.
The PDF Generator add-on uses the HTML language to define the files' contents and structures, combined with the fields' tags (the same tags supported by the notification emails and thank you pages): https://cff.dwbooster.com/documentation#special-tags
We've decided to use HTML because it is easy to learn but a powerful programming language. Furthermore, to preserve the coherence with other sections of the plugin.
Important note: the HTML code used to generate the PDF file must be well formatted.
As in other posts in this blog, I'll describe the use of the add-on with a practical example.
I'll describe the process with a practical example:
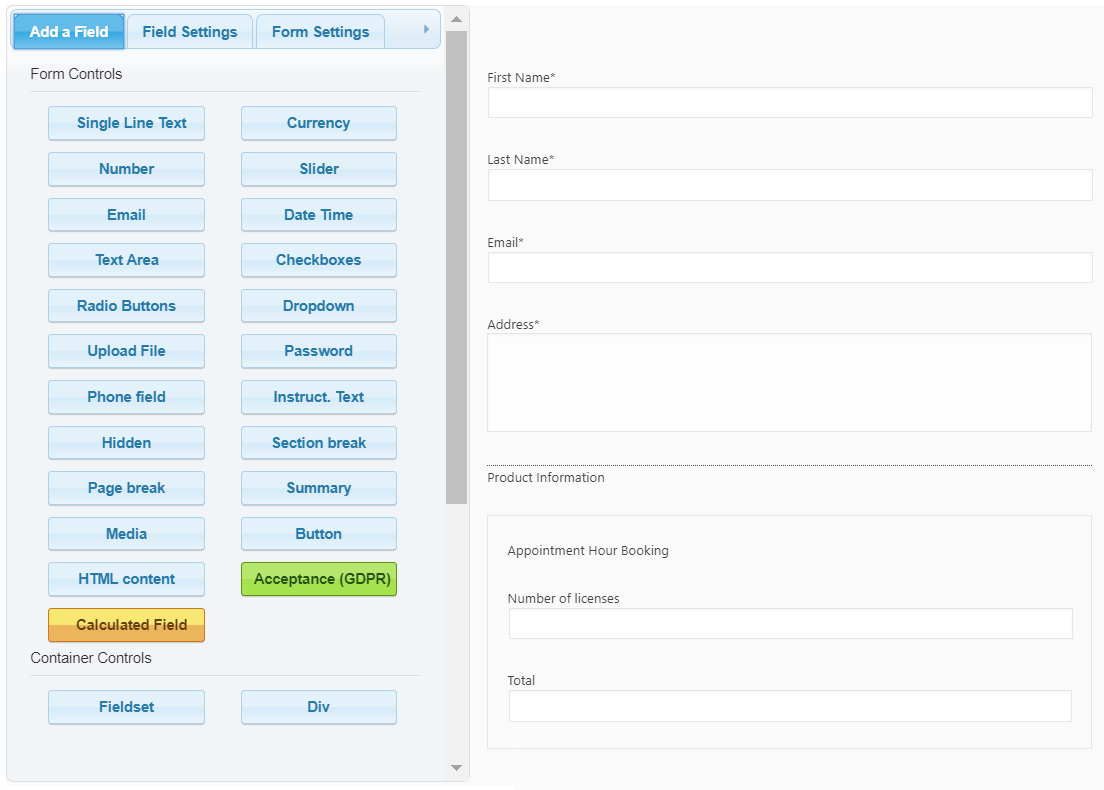
I've created a form with the Calculated Fields Form plugin, and I need to generate an invoice with the information collected by the web form and send it to the buyer:
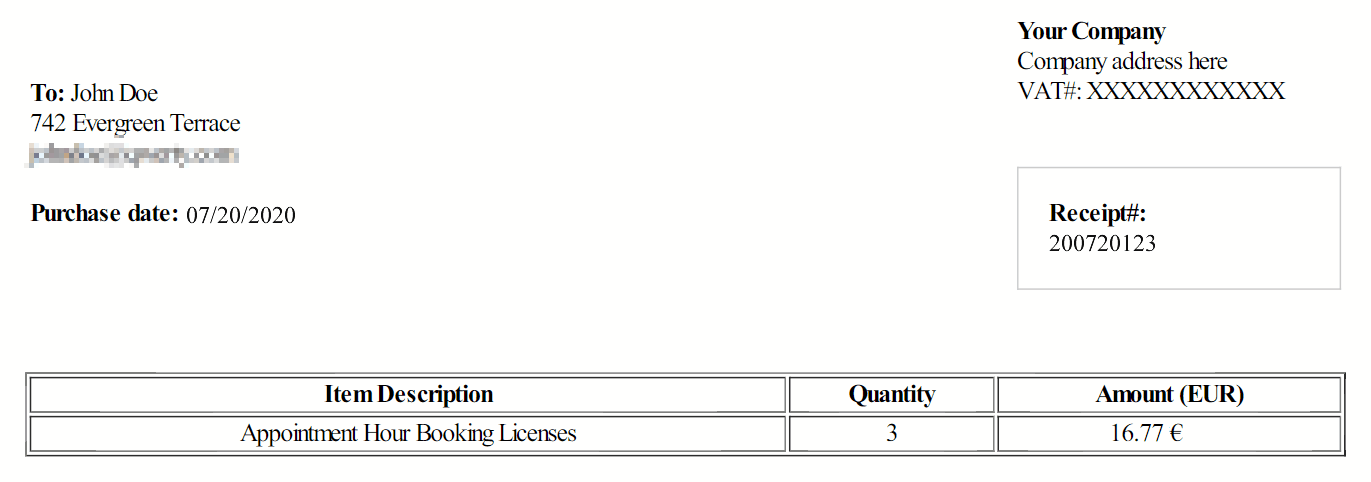
The PDF file will have the structure:
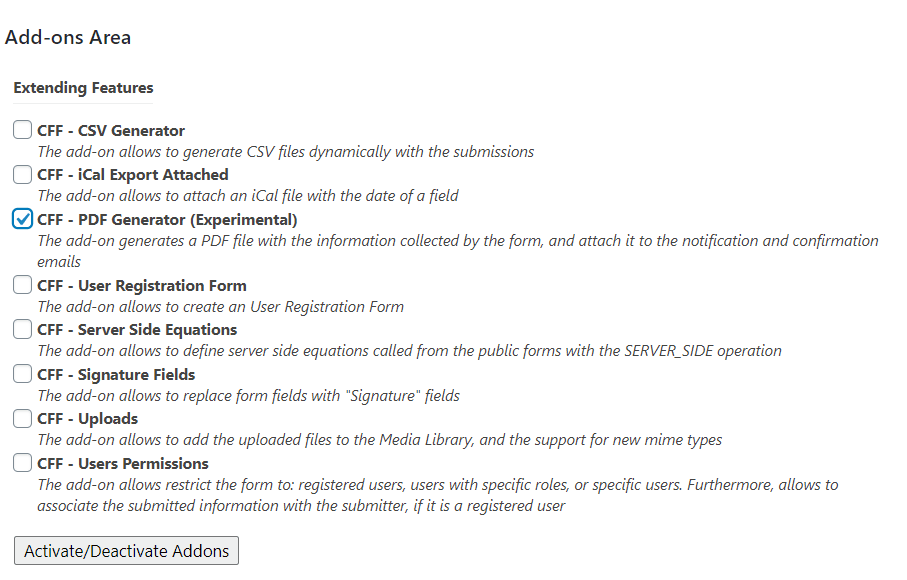
The first step in the process would be to enable the add on. For this, go to the settings page of the plugin clicking on the WordPress menu option: "Calculated Fields Form" (this page contains the list of add ons), tick the "CFF - PDF Generator" checkbox, and click on the "Activate/Deactivate Addons" button:
Once enabled the add-on, is time to integrate it with the forms. The PDF Generator add-on includes a new section in the form's settings:
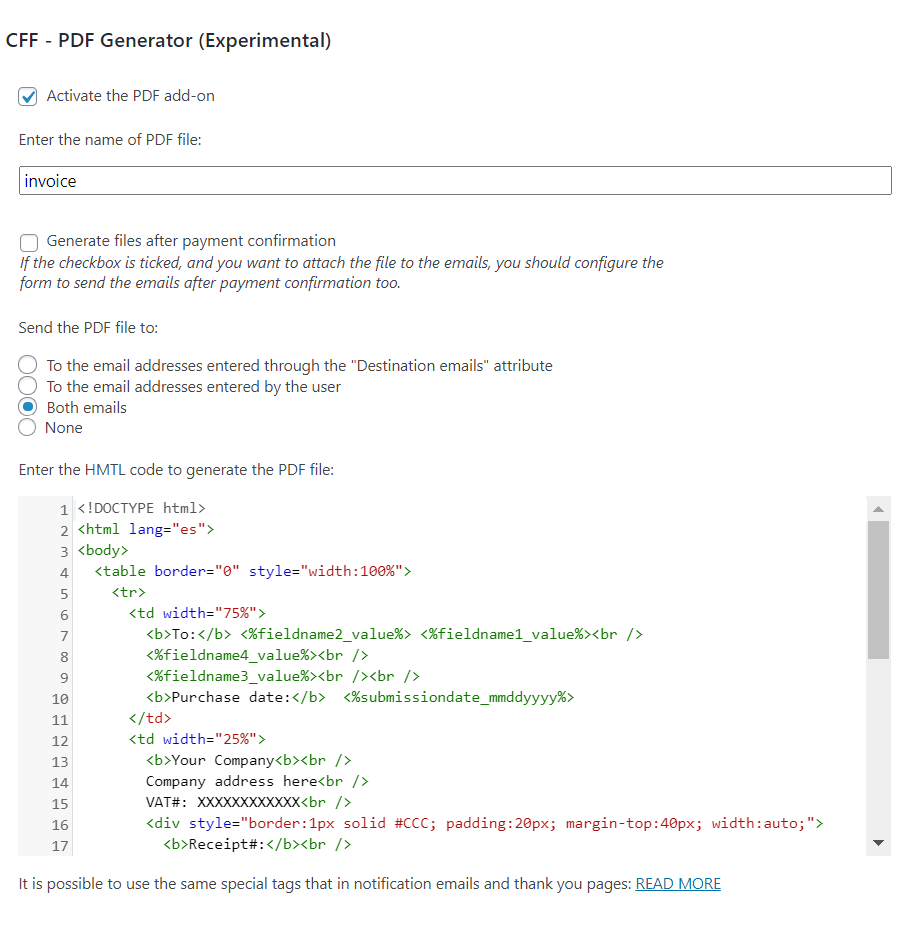
The PDF Generator settings includes the following attributes:
Activate the PDF add-on: It allows activate/deactivate the add-on in the current form.
Enter the name of PDF file: Enter the name of the file, with no path or extension, EX. Purchase Receipt or Invoice
Generate files after payment confirmation: Tick the checkbox if there is a payment gateway active in the form and you want to generate the PDF file after receiving the payment confirmation from the payment gateway.
Send the PDF file to: The PDF files are sent as attachments in the notification emails. this attribute allows you to decide which mail between the following alternatives:
To the email addresses entered through the "Destination emails" attribute
To the email addresses entered by the user
Both emails
None (the add-on generates the file but does not send it by email)
[CP_CALCULATED_FIELDS_RESULT]

<a href="<%pdf_generator_url%>">Download PDF File</a>

[/CP_CALCULATED_FIELDS_RESULT]
<!DOCTYPE html>
<html lang="es">
<body>
<table border="0" style="width:100%">
  <tr>
    <td width="75%">
      <b>To:</b> <%fieldname2_value%> <%fieldname1_value%><br />
      <%fieldname4_value%><br />
      <%fieldname3_value%><br /><br />
      <b>Purchase date:</b>  <%submissiondate_mmddyyyy%>
    </td>
    <td width="25%">
      <b>Your Company<b><br />
      Company address here<br />
      VAT#: XXXXXXXXXXXX<br />
      <div style="border:1px solid #CCC; padding:20px; margin-top:40px; width:auto;">
        <b>Receipt#:</b><br />
        <%itemnumber%>
      </div>
    </td>
  </tr>
  <tr>
    <td>
        <table border="1">
          <tr>
            <th>Item Description</th>
            <th>Quantity</th>
            <th>Amount (EUR)</th>
          </tr>
          <tr>
            <td>Appointment Hour Booking Licenses</td>
            <td><%fieldname8_value%></td>
            <td><%fieldname9_value%></td>
          </tr>
        </table>
    </td>
  </tr>
</table>
</body>
</html>
The text in the PDF file is in Chinese or includes Cyrillic characters:
For texts in Chinese, include a <head></head> section after the <html> tag, tag, with a block of styles to import a font file for Chinese characters, as follows:
<head>
  <meta http-equiv="Content-Type" content="text/html; charset=utf-8" />
  <style>
    @font-face {
      font-family: 'Firefly Sung';
      font-style: normal;
      font-weight: 400;
      src: url(https://eclecticgeek.com/dompdf/fonts/cjk/fireflysung.ttf) format('truetype');
    }
    * {
      font-family: Firefly Sung, sans-serif;
    }
  </style>
</head>
For Cyrillic characters, the equivalent piece of code would be:
<head>
  <meta http-equiv="Content-Type" content="text/html; charset=utf-8" />
  <link href="https://fonts.googleapis.com/css2?family=Roboto:ital,wght@0,100;0,300;0,400;0,500;0,700;0,900;1,100;1,300;1,400;1,500;1,700;1,900&display=swap" rel="stylesheet">
  <style>
    * {font-family: 'Roboto', sans-serif;}
  </style>
</head>
For Japanese characters, the equivalent piece of code would be:
<head>
  <meta http-equiv="Content-Type" content="text/html; charset=utf-8" />
  <link rel="preconnect" href="https://fonts.googleapis.com">
  <link rel="preconnect" href="https://fonts.gstatic.com" crossorigin>
  <link href="https://fonts.googleapis.com/css2?family=Noto+Sans+JP:wght@400;700&display=swap" rel="stylesheet">
  <style>
    * {font-family: 'Noto Sans JP', sans-serif;}
  </style>
</head>
I want to include a page break before some text or content:
You should use an inline style tag with the css rule page-break-before: always;
For example, assuming there is a paragraph in text, and you want to start in a different page of the pdf file:
<p style="page-break-before: always;">
Text here...
</p>
Note: to include the page's break after the paragraph, the CSS rule to use would be: page-break-after: always;
Including header and footer on every page, and pages numbers:
<html>
<head>
    <style>
        @page { margin: 180px 50px; }
        #header {
            position: fixed;
            left: 0px;
            top: -180px;
            right: 0px;
            height: 150px;
            background-color: orange;
            text-align: center;
        }
        #footer {
            position: fixed;
            left: 0px;
            bottom: -180px;
            right: 0px;
            height: 150px;
            background-color: lightblue;
        }
        #footer .page:after { content: counter(page, upper-roman); }
  </style>
</head>
<body>
    <div id="header">
        <h1>Widgets Express</h1>
    </div>
    <div id="footer">
        <p class="page">Page </p>
    </div>
    <div id="content">
        <p>the first page</p>
        <p style="page-break-before: always;">the second page</p>
    </div>
</body>
</html>
