Tips and cases of use for a successful WordPress website with calculated forms.
Categories: Add-ons, Security, User Communications
The post describes how to check that the user enters a real email address, and has access to it.
Continuing the series of posts on emails. A popular solution for verifying users' emails is to send them a unique verification code and ask for this code before continuing with the paused process, in our case, the form submission.
In another post, we talked about using external services to validate emails and discard emails that do not meet the requirements of our projects, such as free email accounts, disposable emails, or low-scoring emails.
In the current post, we will show you how to verify the email address exists and that the user has access to it.
To verify user emails, we have implemented the "Verification Code" add-on (distributed with the Developer and Platinum versions of the plugin). The "Verification Code" add-on pauses form submission until the user enters the verification code.
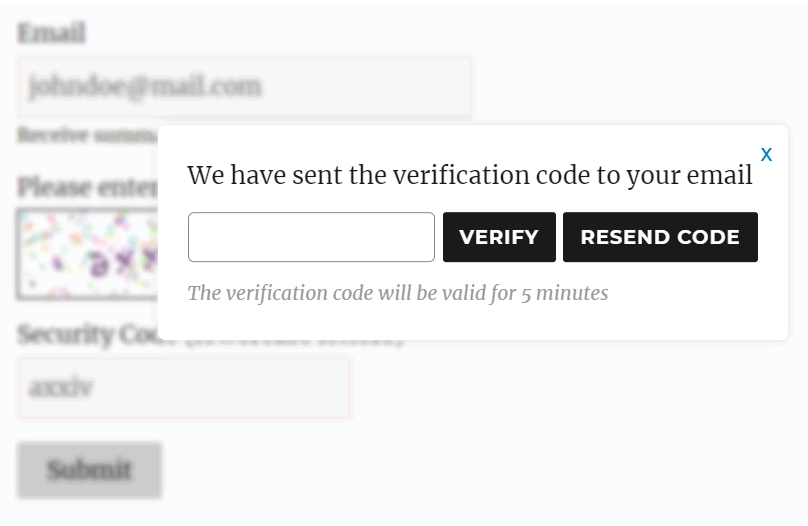
The process would be as follows. The user fills in the form by entering their email address, and presses the submit button. At this point, the add-on sends a unique verification code to the email address and opens a dialogue box to verify this code.
Once the user receives the email, he/she must enter the verification code via the dialogue box. If the code entered by the user matches the code sent by the add-on, the form would complete the submission, or display an error message if it does not.
The "Verification Code" add-on assigns a 5-minute expiration time to verification codes.
The code expiration ensures that a user cannot enter an old code to verify an email to which he no longer has access.
The use of the "Verification Code" add-on is very easy.
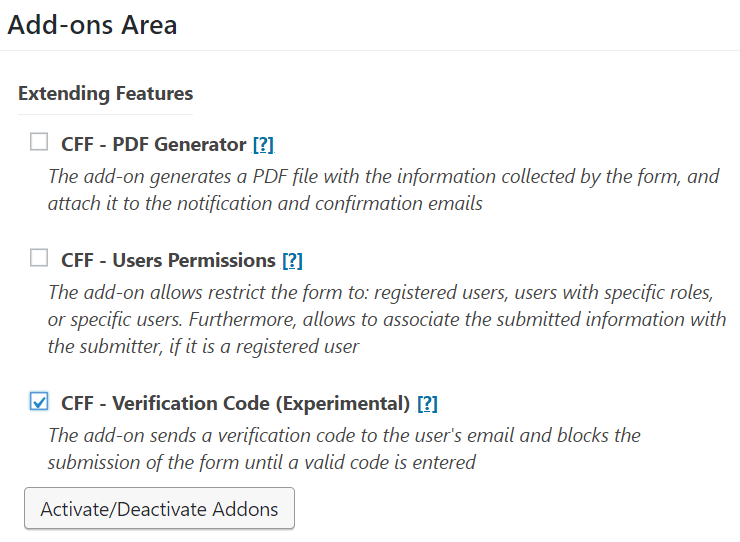
The first step would be to activate the add-on (remember that it is distributed with the Developer and Platinum versions of the plugin).
To do this, go to the plugin settings page via the menu option: "Settings > Calculated Fields Form", tick the "CFF - Verification Code add-on" checkbox from the list of add-ons, and press the "Activate/Deactivate Add-ons" button.
After activate the add-on, it will include a new section in the forms' settings that allows you to integrate the verification code process into the form.
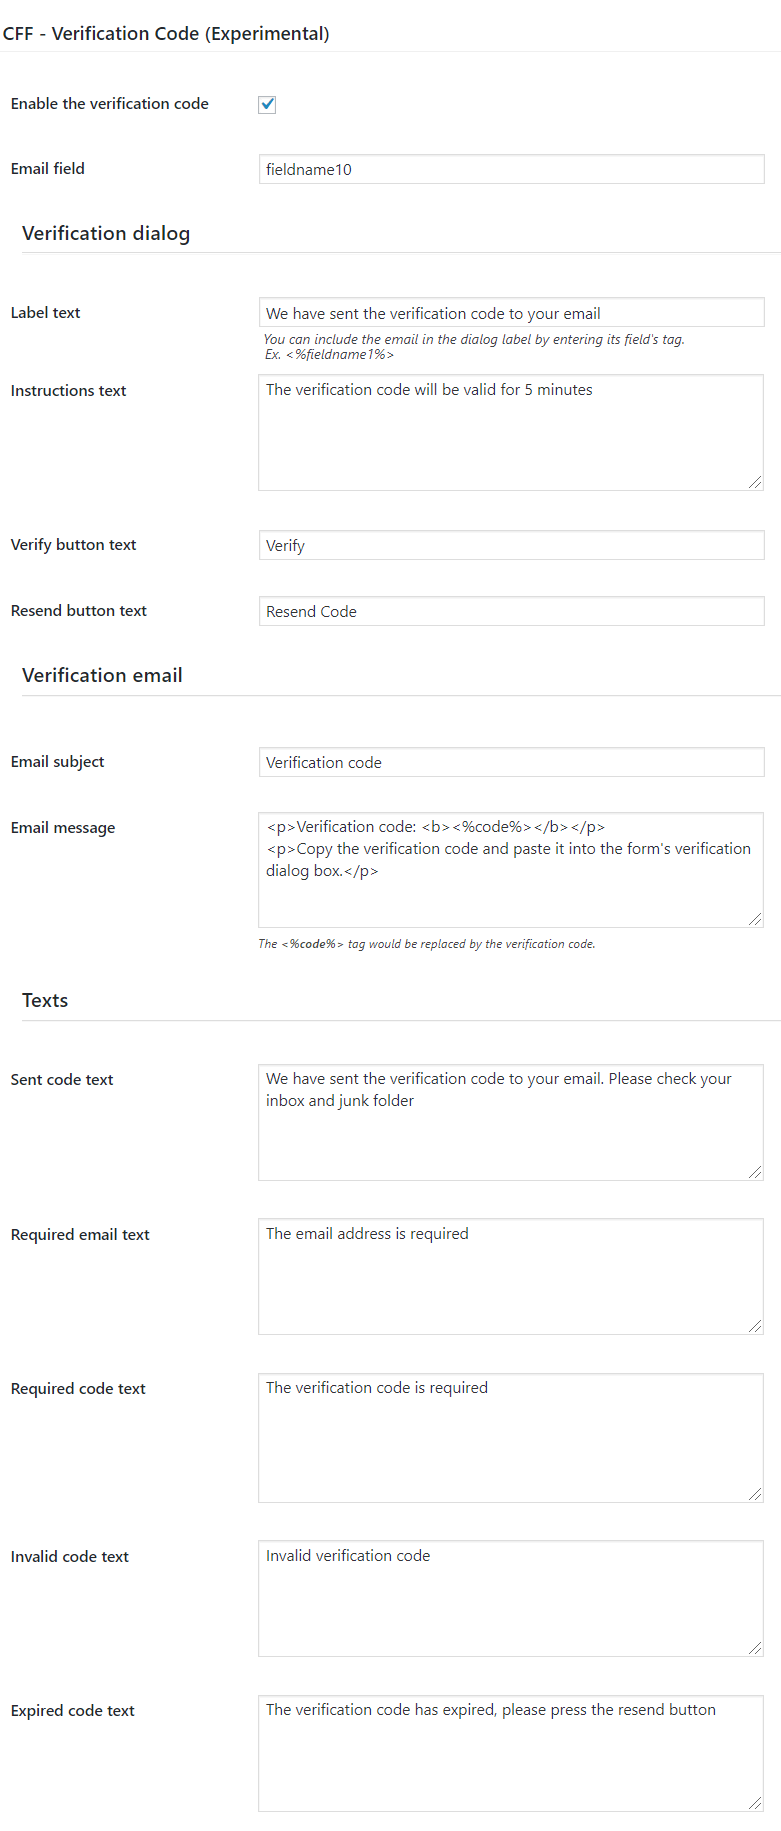
From the form settings, you can enable or stop the add-on on the form, enter the name of the email field you want to verify (only one email field per form), and the texts of the verification dialogue, the text of the email, and possible error messages.
